FAQ Categories
More from Upload
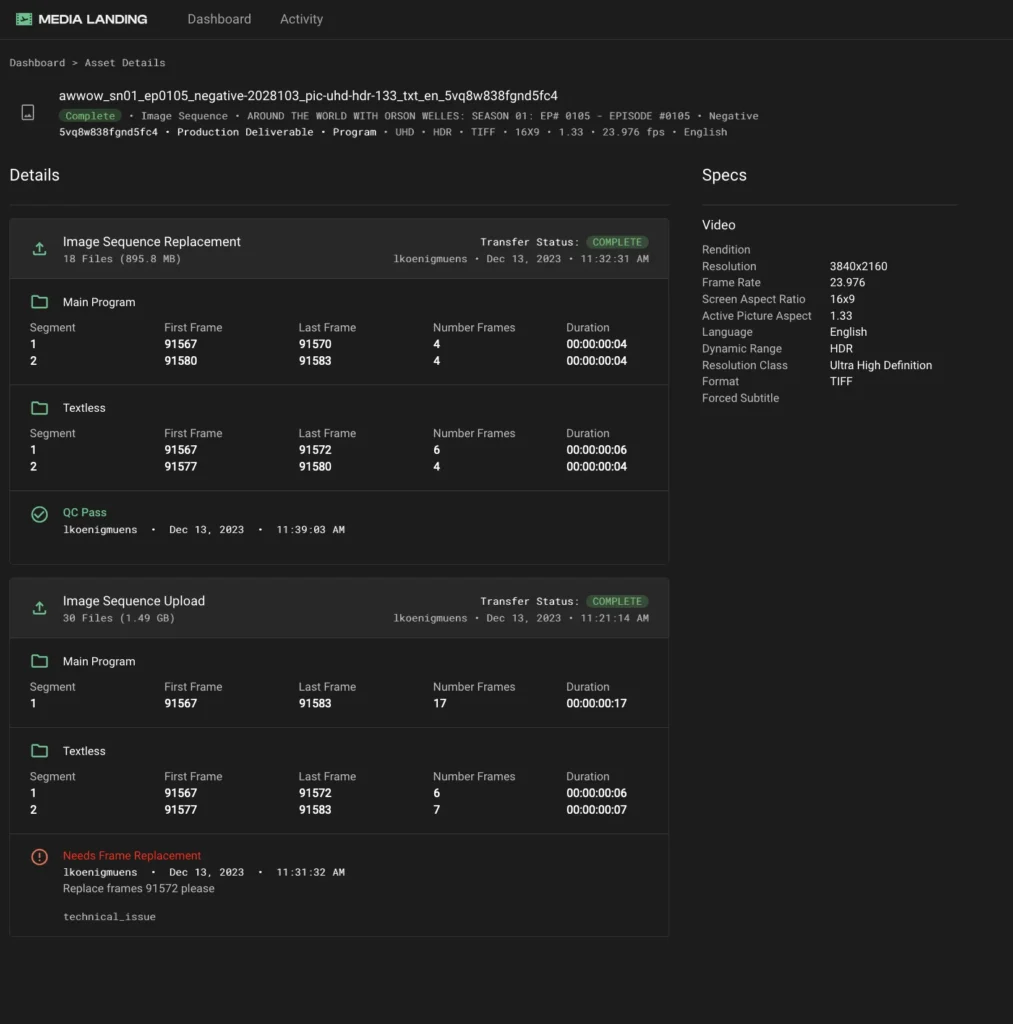
Using Placeholders
Updated on 09.10.2025STEP
1
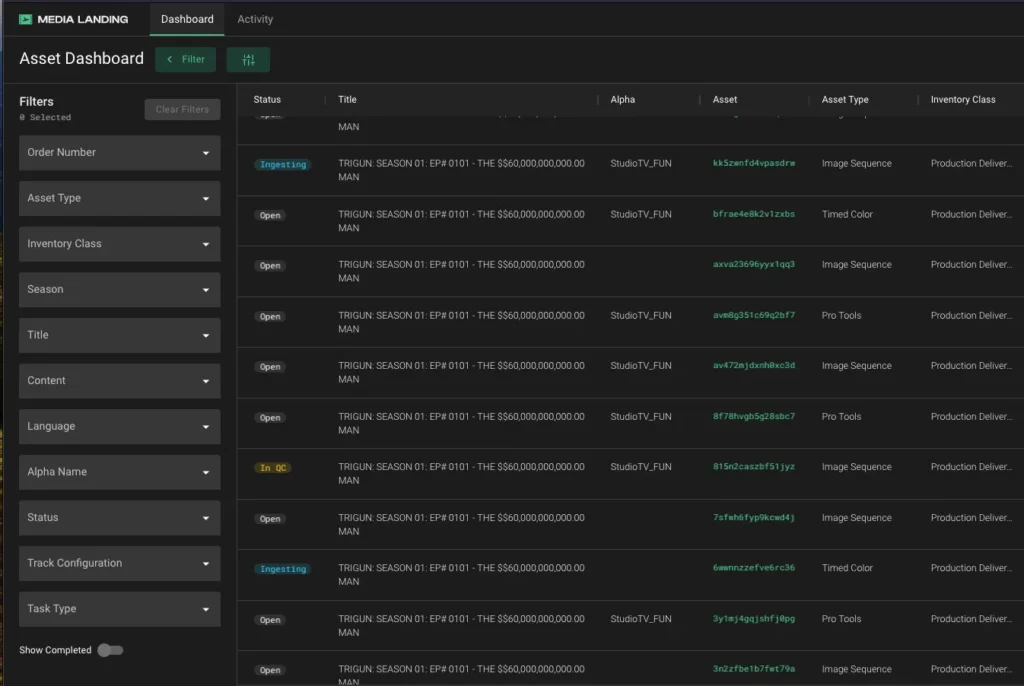
Select a Placeholder by clicking on it in the results pane of the Asset Dashboard.
STEP
2
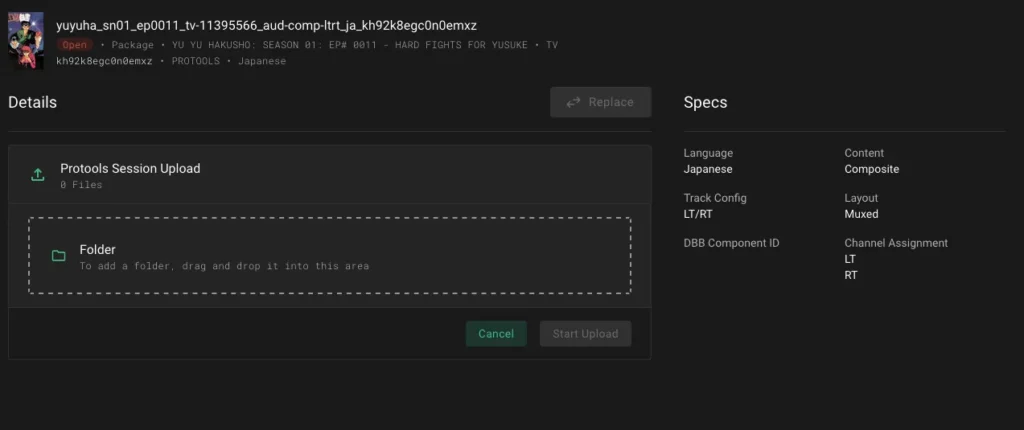
The Placeholder will open, and you’ll be presented with a dropzone where you will be able to drag a single asset or group of assets. Depending on the Placeholder selected more than one dropzone may be available.
STEP
3
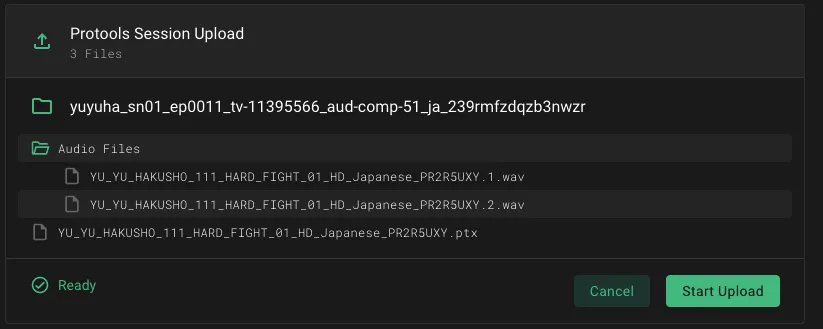
When you drag assets onto the dropzone, the Placeholder will display the name of the file to be uploaded or an inventory of the folder. If everything looks correct, click the Start Upload button.
STEP
4
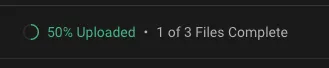
And initial check will be run to confirm that the assets match the Placeholder specifications. If an asset fails this initial check you will need to correct the issue.

If the asset passes this initial check, click the Start Upload button.
STEP
5
Click Cancel to stop the upload of an asset. The transfer status will change to Cancelled.
STEP
6
Once an asset has been transferred to Media Landing, you will use the Replace button to submit new versions of the asset.


Note that all previous uploads of an asset are retained in Media Landing until and asset is finalized.
For more details on the values and labels shown on the interface, see the quick reference sheet “Asset Placeholders.”